Tips for getting the most out of Nutrisense and how to use it
April 26, 2022 at 11:25AM
Sharing some tips of using Nutrisense and how to get the most out of it! I was gifted my Nutrisense CGM sensors, and this post is not sponsored. My code to try it out is GINA50 for $50 off <— not affiliate, just wanted to share a discount with you all.
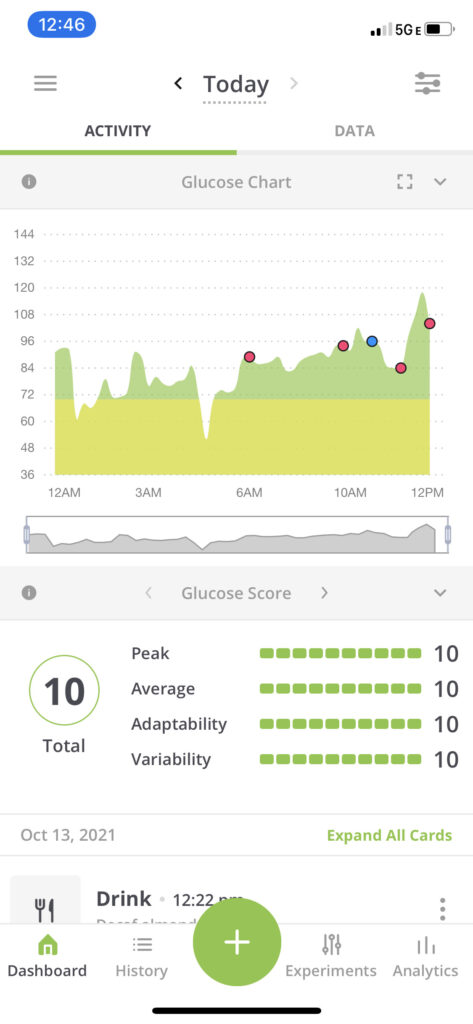
Hi friends! How’s the day going? I have back-to-back client calls today and am looking forward to Taco Tuesday with the fam. I recently put on a new Nutrisense CGM and thought it was time for an updated post! Fun fact: my CGM assured me that my body does indeed LOVE Mexican food. Tacos, rice, beans, guac, margarita: NO SPIKE. It’s literally in my blood. 😉
Tips for getting the most out of NutriSense and how to use it
I first wrote about my experience with Nutrisense here but knew that there was a LOT more I wanted to share on the blog, especially since I have a Nutrisense and CGM expert at my fingertips. I reached out to Mia because she’s worked with Nutrisense to see if she’d mind sharing some tips on how to use your CGM, run experiments, and any extra tips she could share. I’m so happy that she put together this amazing post for you!!
(Ps if you don’t have a Vuori romper yet, they are life changing.)
Getting started
How to apply your Continuous Glucose Monitor (CGM)
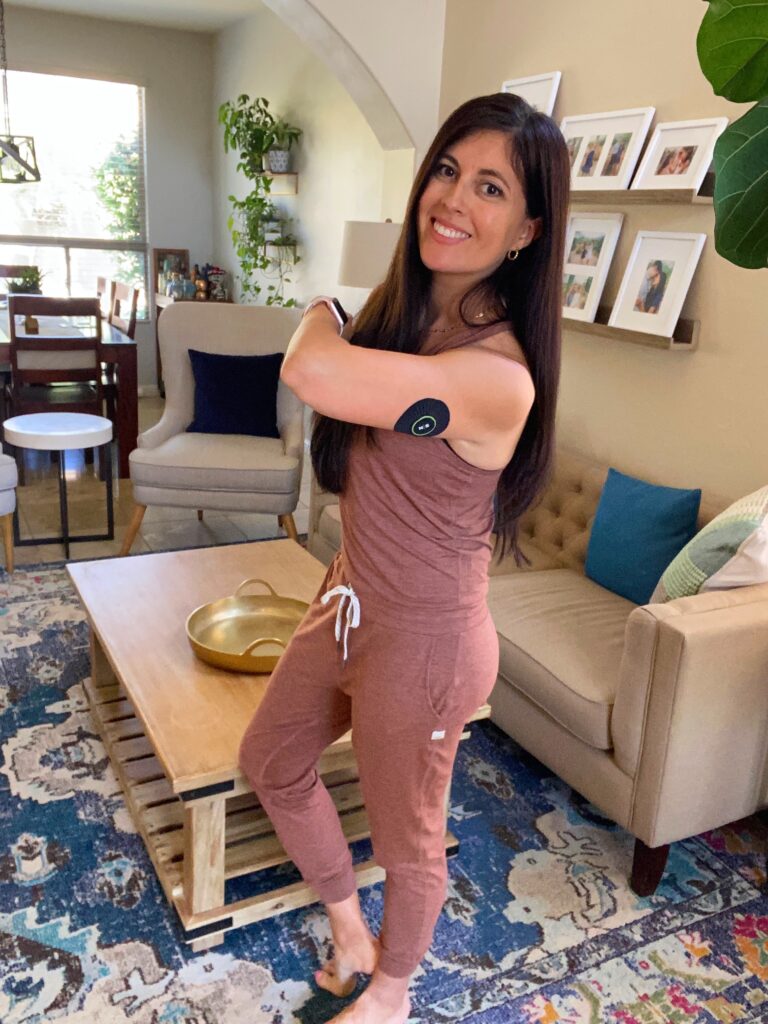
I took a quick video of my CGM application so you guys could see it again in action, especially since I’m more comfortable doing it now. You guys. I’m the biggest needle phobe. The first time I did a CGM, I paced around my house sweating for days. I eventually did it (with Mia’s help!) because I really wanted the data. Now, it’s nothing. It’s SO easy and painless to insert.
Here’s a video of the application process! Nutrisense uses the Freestyle Libre CGM. Please note that I’m NOT a doctor. This is just what works for me and I’m sharing my experience in case anyone else is wondering about this.
Next steps once you’ve applied your CGM:
Step 1:
Download the Nutrisense app and get familiar with adding meals, notes, and scanning your CGM. Play with everything. You can’t break the app and if you do, customer support is always around to help.
Step 2:
Take advantage of the one month complimentary RD support. The NutriSense dietitians are there to support your goals related to health and nutrition. Feel free to ask them any questions as it pertains to the CGM, nutrition, health, your data, food, or any experiments you’re interested in running. Where else are you going to get access to your very own RD nearly everyday and not a “bot?” They only work business days and will always respond to you within 24 hours on weekdays, so if you need help on the weekend, get your questions in before the end of Friday afternoon. 😉
Step 3:
Communicate with your RD about how often you would like he/she to check in. They can check on you frequently, like every 2-3 business days or weekly at minimum. So, if you prefer to discover on your own, that’s cool too, but they will always pop in once a week to make sure you are doing alright. No food police, but helping you analyze your data so you can find the optimal diet for your glucose levels.
Step 4:
The first week you are wearing your CGM, they suggest that you follow your normal habits and routine, taking note of any spikes greater than 140 mg/dL. Once they can see your normal behaviors, then the experiment and tweaks can take place.
Step 5:
Week 2, start to have a little fun with your data. You can even ask your RD for suggestions for experiments. It’s highly recommended that you plan to experiment with a food that you eat as you normally would first and then make tweaks the second time.
An example of a “mixed meal” experiment:
First time: Chipotle bowl with chicken, rice, beans guac and chips. Order as usual and eat like you typically would
Second time: Chipotle bowl with the same ingredients. This time practice meal order sequencing: eat half the chicken first, then dive into the vegetables/lettuce/guac and finish the rest of the meal as desired, mixing bites of chicken in with the rice and beans. Finish with chips if you’re still hungry.
Third time: Try eating the meal as you normally would but go for a 10 minute walk before the meal and a 15 minute walk after the meal
Fourth time: take a shot of apple cider vinegar in 2 oz of water about 10 minutes before eating. Eat like you normally would.
Do you notice that one response is better for you?
If testing single foods and naked carbs, perhaps you will test:
– Various grains like rice, oats, quinoa, gluten free breads, tortillas
– Various starchy vegetables like potatoes, sweet potatoes and butternut squash. Does cooked and cooled matter vs. cooked and eaten immediately?
– Various crackers and chips: corn, cassava, seeded, almond flour, etc
– Various sugar free sweeteners: stevia, monk fruit, erythritol
– Various fruits fresh vs. dried : apples, pears, grapes, berries, tropical fruit like pineapple, melon, mango, etc.
Step 6:
If you choose a 3 month subscription, you can continue to experiment with different foods, combinations and meals weeks 2-4 before beginning to fine tune and tweak your optimal meals & foods.
Having the extra weeks to play with foods and optimize meals is a great idea and only provides more insight, considering that sleep, stress, workouts, and lifestyle all influence meal response and recovery.
Did you know that what you ate the day before and the quality of sleep the night before all affect your glucose response for the day? A poor night sleep can lead to higher glucose values the next day and higher evening glucose values due to late meals and carbs at night can lead to a poor night of sleep. It can turn into a never ending cycle!
If you chose only a one-month subscription, which includes 2 sensors, perhaps consider dividing up your sensors this way:
Week 1- eat normally
Week 2- experiment with different foods and meals
Week 3- fine tune and make any adjustments
Week 4- see your “plan” in action
Benefits of RD support:
Did you choose a 3 month+ subscription? Kudos for you! Renew your RD support after your 1 month ends for only $50. I mean, where else will you be able to find 1:1 support tailored to your goals and behaviors for $50 a month? Don’t worry though, if you decide not to proceed with RD support and find yourself wanting your expert back, you can message him/her through the portal and be connected again!
Having ongoing nutrition support can be super helpful if you are trying to achieve specific goals such as:
– Weight loss
– Body composition changes
– Fat loss
– Hormonal balance
– Optimize your pre- post workout nutrition for performance, endurance and strength
– Work on mindfulness and breath work to help manage stress
– Optimize sleep
– Optimize digestion
– Tweak your meals to make them more glucose-friendly
– Improve your fasting glucose values… you want them between 70-90 mg/dL
The best part about using a CGM:
Learn as much as you can so you can implement new strategies and make changes! Remember, wearing a CGM is providing you with instant feedback so you can make changes to your lifestyle and diet regimen in real time. It is data that you can use instantly to make changes. Knowledge is power. It’s another tool in the tool box to optimize glucose, create metabolic flexibility and achieve health and vitality.
Do you have any questions about using Nutrisense or another CGM? Is this something you’ve considered trying? If you decide to give it a whirl, you can use the code GINA50 for $50 off.
What’s your favorite health device or wearable gadget?
xoxo
Gina
The post Tips for getting the most out of Nutrisense and how to use it appeared first on The Fitnessista.
Continue Reading…
Author Fitnessista | citywomen.co
Selected by CWC


